Pages

Saturday, December 4, 2010

Vietnamese Steak Sandwich

We've had these a couple of times in the last few weeks.  These sandwiches might be one of our most favorite dinners.

I've followed the recipe exactly except that I've marinated the steak all day instead of just 30 minutes and both times I've forgotten the cilantro.  It's still yummy though.

Vietnamese Steak Sandwiches

Ingridients:
1 garlic clove, minced
1 teaspoon sugar
1/4 teaspoon red-pepper flakes
1 tablespoon rice vinegar
1 tablespoon water
2 carrots, grated
2 scallions, thinly sliced
1/2 cup packed fresh cilantro leaves
4 hero rolls
1 pound sliced Flank Steak with Lime Marinade

Directions
In a small bowl, stir together garlic, sugar, red-pepper flakes, vinegar, and water.
In another bowl, toss together carrots, scallions, and cilantro leaves. Toss with half the vinegar mixture.
Split and lightly toast hero rolls; dividing evenly, layer with carrot mixture and sliced flank steak. Drizzle with remaining vinegar mixture, if desired.

Lime Marinade:
1/3 cup (about 4 limes) freshly squeezed lime juice

2 tablespoons soy sauce
2 scallions (about 1/3 cup), thinly sliced
2 tablespoons minced, peeled fresh ginger
1/2 teaspoon red-pepper flakes
1 1/2 pounds flank steak
Vegetable oil, for grates
Coarse salt and ground black pepper

Directions
In a resealable plastic bag, combine lime juice, soy sauce, scallions, ginger, and red-pepper flakes. Add steak, and seal bag (place in a dish to catch any leaks); marinate in the refrigerator, turning occasionally, up to 1 hour.

Heat grill to high; lightly oil grates. Remove steak from marinade, letting excess drip off (discard marinade); season with salt and black pepper. Place on grill; cover. Cook, turning once, until meat reaches desired doneness, 6 to 8 minutes for medium-rare. Let rest 10 minutes before slicing thinly.

Recipe courtesy of Martha Stewart

Thursday, December 2, 2010

The best, fast hot chocolate

photo.jpg

I regularly crave hot chocolate in the winter time. Seriously. Like every day.

I like the real stuff. No powder and water mixed for me.

If you crave the H.C. like I do, here's a quicky that's sure to please.

You'll need:
milk (1 cup per person)
chocolate (nestle quick works, or Hershey's syrup, or if you were really indulgent, actual chocolate)
1-2 tablespoon sugar
1 teaspoon vanilla
vanilla ice cream (1 and 1/2 scoops per person)

Put a pan on the stove. Add your milk, chocolate, sugar and vanilla. Keep on the stove top until it's at the perfect temperature for you. Pour into cups. Add ice cream scoops on top.

Enjoy!

Sunday, October 31, 2010

Cupcake Weekend

We had two parties this weekend.  That meant I got to get my bake on.

Two different kinds of cupcakes were in order.

The first - Lemon with Vanilla Bean Frosting
1 lemon cake mix (replace the water with buttermilk, but leave the rest of the ingredients the same)
1 package lemon instant pudding
1 cup sour cream

The icing was just a basic butter cream but I borrowed some Madagascar Vanilla Bean Paste from a friend and oh my!  Heaven on a cloud

2 sticks butter, room temperature
2 tbsp milk
2 and 1/2 teaspoons bean paste
4 cups powdered sugar (approximate)

The finished product was beautiful and I was completely in awe of the little vanilla bean flakes. Definitely gave the treats a gourmet feel.
IMGP9621

The second cupcake I've made before, but it was yummy as well - chocolate cake with peanut butter frosting.
The cake was also from a mix with 1 cup of sour cream, 1 package of chocolate instant pudding and buttermilk instead of water.

Peanut Butter Frosting
2 sticks butter, soft
1 and 1/2 c. peanut butter
2 tbsp milk
4 cup powdered sugar

This is enough frosting for about 30 cupcakes so you'll have left over. You can just eat it with a spoon, a spatula, or like I did...straight out of the piping bag.

IMGP9615

Thursday, October 28, 2010

Croissants, Round 3 - call them conquered

photo.jpg

After stewing all weekend, trying to figure out how Round Two went bad, I got up Monday morning and invented my own recipe. I realized I had a few challenges, the worst of which was altitude. Baking at a high altitude always requires a recipe modification and I'd made none to Julia's croissants.

So, I took matters into my own hands and invented my own recipe. I doubled the yeast, switched from regular unbleached/bread flour to cake flour, and doubled the butter. As soon as I saw my dough rising on the stove my hopes were high.

Throughout the day and I chilled and rolled and chilled and rolled I said silent prayers to the french croissant spirits to bless my pastries. Once I got all 12 rolled out and ready to proof I ran away. It was like waiting for the results of a pregnancy test. Seriously - that dramatic.

I hid upstairs for an hour and when it was time to gently lay them in the oven, I came downstairs, smelled the goodness that is bread dough, and walked over to the the oven to take a peek on top.

They were puffy. They looked soft and lovely. I was a bit excited. So excited in fact that I sat on one of the kids little red chairs in front of the over with the light on for 13 minutes while my little babies baked.

As I pulled them out of the oven I was near tears. They smelled better than anything I had ever smelled. They looked flaky. They looked perfect. I grabbed one by the corner and lifted it.....light as a feather.

Croissants were conquered!

The final test was to taste one. Now, I've never eaten a hot out of the oven croissant in my life and let me tell you, it was a little piece of heaven melting in my mouth.

I was told, by my three year old assistant that, "mommy, these are the best croissants I've ever eaten!"

By damn, I think he's right.

Now I just have to figure out how to do it again.

Monday, October 25, 2010

Croissants, round two

Okay -

The first round of Julia Child croissants sort of blew up in my face. In the end, all I made were rolls.

I resolved for Round Two to do things a bit differently.
1 - do a flour mix instead of straight up bread flour
2 - follow the chill times exactly
3 - be nicer and a bit softer in my rolling of the dough

You see, I realized that not only did I beat the dough up, I also didn't use enough butter. I doubled the recipe but didn't double the butter. What a dork!

Fast forward to this past weekend and Round Two.
photo.jpg

I painstakingly followed the directions. I was soft and delicate and used enough butter. Everything seemed to be going really well. The dough seemed to be working in my favor. I pulled the lovely beauties out of the oven. They looked right. They smelled right.

They were all wrong.

I was devastated. The outside was beautiful and crisp and brown but the inside was...a roll. No fluffy and flaky layers of croissant and butter. Instead, I just had french tasting rolls. They were yummy, but not quite right.

It was sad. I almost cried. Instead, I sat down at the computer and tried to figure out what went wrong. I read dozens of recipes and watched videos on YouTube of chefs and french bakeries making these delicate little treats.

A few things became clear.
1 - high altitude is a bugger
2 - i needed more yeast - the croissants just aren't rising enough
3 - more butter! double, in fact.
4 - different flour - cake flour
5 - patience and love

Faced with yet another failure in the bread department (oh, Julia. Why is it so hard?) I am determined to continue the fight (the 9 hour fight) and end up with something any real french baker would be proud of.

It may take me the rest of my life.

But, when I woke up this morning, only one thing was on my mind. Today is the only day I have to try Round three this week and right now, as I type, a dozen reformed croissants (you see I invented my own recipe this morning) are proofing on the stove.

Stay tuned.

Friday, October 22, 2010

A few thoughts on salads

I didn't eat my first salad until I was 21 years old. I was a super picky eater, afraid of vegetables and things that grew in the ground. I thought lettuce tasted like dirt. But, on a trip with a teacher friend of mine I had to suck it up and eat lettuce.

And I liked it.

I still like salads - and can't ever figure out why they are always so much better at a restaurant or for take out than at home. Real food, that I cook for my family is generally always as good or better than something we'd go out and buy. But a salad - that's a tough one.

Yesterday though, I gave it the old salad try...twice.

photo.jpg

For lunch?
Romaine lettuce
Croutons
Crispy shallots
Balsamic Vinegar and Olive Oil as a dressing

Garlic bread

photo.jpg

For dinner?
Butter leaf lettuce
Shredded Carrots
Sun dried tomatoes
Green Onions
Wonton Strips
Grilled steak

Balsamic and Olive Oil


Both were yummy...

Monday, October 18, 2010

It was a weekend of food

On Friday it was Ross' dad's birthday. I fixed a birthday dinner.

The only thing I took a picture of was the molten chocolate cakes. yum.
IMGP9528

On Sunday we celebrated my mom's birthday with a Mexican fiesta.
IMGP9531

Chicken enchiladas, beef empanadas and a whole lot of other stuff.

Today was my mom's actual birthday and I made her a treat. The chocolate icing was absolute heaven.
homemade chocolate icing

Monday, October 11, 2010

Trial and Error - Croissants, the first try

photo.jpg

There are a few reasons I'll divulge at a later date, but I've decided to try my hand at croissants.

Yes, the authentic french kind.

Full of butter.

Melt in your mouth.

Bread is not my friend.  Every single time I've tried to follow a bread recipe it doesn't work.

Same thing for my croissants.  I tried this recipe - the authentic Julia Child one and, well, they were yummy.  But my croissants were just delicately shaped rolls.  No layers.  No flake.  No oui oui!

But, I'll try again this weekend, too.

Thursday, September 30, 2010

Sweet Empanadas

IMGP9282

A couple of weeks ago I made savory empanadas with beef and other yumminess.  Over the weekend I made sweet empanadas - cherry, blackberry, and cinnamon and sugar.

yum.

yum.

yum.

If you're interested, these are super easy.  The dough is the exact same cream cheese dough as for savory empanadas, just with about a teaspoon and a half of sugar added into the butter and cream cheese.

For the filling, I just used canned pie filling.  The cinnamon and sugar set were a bit different, though.  I coated a marshmallow in butter, then a sugar mixture and then folded them into the dough.  They exploded while baking, but were still really good.  Next time, I'll use small marshmallows, not giant roasting ones.

Chocolate Peanut Butter Cupcakes

photo.jpg

First, there is a lot of sweet stuff on this blog. Second, I need to stop taking pictures with just my phone.

Noted.

Third, though - I had a little church party on Tuesday night and I wanted to make something yummy. The activity required that people bring pies. I don't like pie. I do however like cake.

I made these - they were delish.

For the cupcakes -
1 box chocolate cake mix, any brand you like. Follow the directions on the box except for the following:
add 1 cup sour cream
add 1 package instant chocolate pudding
use milk instead of water (or buttermilk if you have it)

Bake as directed

For the icing -
2 sticks butter - room temperature
1 cup peanut butter
a little bit of milk
a lot of powdered sugar, 4 cups or so.

cream the butter and peanut butter. Slowly add the powdered sugar until you get the icing consistency you'd like. If it gets to thick, add milk...or more milk.

Top with chopped up PB cups (store bought or home made) if you're so inclined.

Monday, September 27, 2010

Homemade Peanut Butter Cups

IMGP9278

When I was a little girl, my grandma would, on Easter and Christmas, make homemade peanut butter cups. I lived for the chocolate bunnies and trees and whatever else she would make. Seriously. Lived for them.

Now, I'm a fan of the store bought PB cups as well, and in my youth, was known to eat dozen upon dozen of the miniatures.

Nothing beats making your own though. Nothing is faster and tastier either.

What you'll need:
Peanut butter
Powdered sugar
Melting chocolate

In a mixing bowl, add equal parts peanut butter and powdered sugar. Mix thoroughly until incorporated. If the PB is still sticky to your touch, add a little bit more sugar. You don't want the PB stick at all.

Next, melt some chocolate.

While you're melting chocolate, get your molds, paper cups, whatever your going to use ready.

When the chocolate is melted, pour a little bit into the base of your container. next, add a hunk of PB sweetness then cover with chocolate.

Refrigerate to set.

Enjoy.

Thursday, September 16, 2010

Beef Empanadas

photo.jpg
Another yummy recipe from the Mad Hungry cookbook.  Seriously, go and buy it today.  You'll thank your self later.

This recipe was really pretty easy, but much more time consuming than I normally would go for on a week night.  But, since my husband is a work-a-holic and we've been eating dinner an hour later than normal, I had the time.

Anyway - for the first time, it took me two hours from start to finished and on the table.  Was it worth it?  Oh yes.  So worth it that I might make them again next week - but actually figure out how to make a side dish, too.  Not that these babies need anything else.

First, you need to make the pastry.  At a minimum, the pastry needs to chill for thirty minutes.  Mine chilled for about 8 hours and then needed to sit on the counter for a good 15-30 before it was ready to roll out.

Cream Cheese Pastry
8 tbsp unsalted butter at room temp
4 oz cream cheese at room temp
1/4 cup heavy cream
1 and 1/2 cup plus 2 tbsp flour
1/2 tsp salt

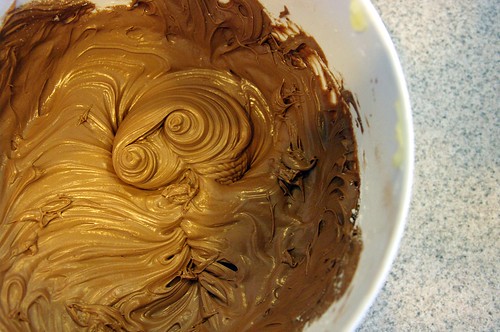
cream the butter, cheese, and cream with an electric mixer.  Add the flour and salt until incorporated.  Split the dough into two equal sections, form into two disks and wrap each one separately in plastic wrap.  Place dough in the fridge.

Beef filling
1 tbsp olive oil
1 small onion, chopped fine
1 small green pepper, chopped fine
1 lb ground beef
1 tsp ground cumin
3/4 cup olives, chopped (green or black)
3/4 cup raisins (I didn't use these)
1 tsp honey
1 tsp salt
1/4 tsp pepper
dashes of hot sauce to taste
2 eggs, separated

Chop the onion and the green pepper and start to saute them in a very hot pan, in the olive oil.  When the onions are starting to get translucent, add the beef.  When the beef is almost 100 % cooked, add the olives and raisins (if you like), the honey, the cumin (I didn't have cumin so I just used a whole butt load of different seasoning salts), the honey, salt, pepper,  and hot sauce.  Let cook until the beef is completely finished and turn off the heat.

The beef needs to cool completely in the fridge.  After it has cooled completely, stir in the egg whites from your two eggs.

While the beef is cooking, get out your cream cheese pastry so it can warm up a bit.  Once the beef is in the fridge to cool, it's time to roll out the dough.

Work with one disk at a time and roll it out like you would for sugar cookies.  Make sure you have a clean, well floured work surface and a good rolling pin.  Roll the dough pretty thin and then use a medium bowl (about 5 inches across) as your dough cutter.  Place the bowl on the dough and with a knife, cut around the edges.  Repeat the process, only re-rolling each piece of dough once.

If you do it right, you should end up with 10-12 circles of dough.

To assemble the empanadas, place a couple small spoonfuls of meat filling onto one half of a dough circle.  Wet the outer edge of dough with some water and fold it over, pressing each edge together gently.  Then with a fork, crimp the edges together.  Do this for all of your dough circles, making little half moon pies.

Once all are finished, place them on a cookie sheet and stick them back in the fridge while the oven heats up to 375 degrees.

Once the oven is hot, take the empanadas out of the fridge and poke some holes in them with a fork.  Then, take the two egg yolks, mix them with 1 tbsp of water and give each empanada a quick egg wash.

Bake for 20-25 minutes, until golden brown.

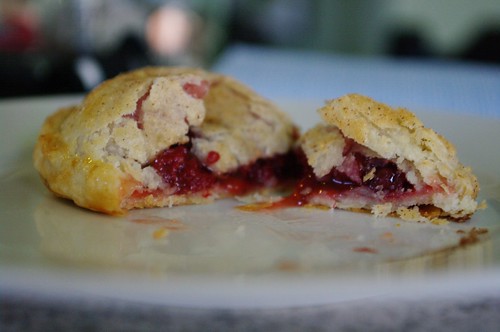
Let them rest for about 7 minutes before you devour them.  They will still be super dooper hot.

So yummy, so yummy.

Enjoy!

Wednesday, September 15, 2010

Italian French Fries

I have a new cook book.  Mad Hungry!  The book?  Holy cow.  Reading it is like reading a novel that I cannot tear myself away from, except that my mouth is watering the entire time.

The recipes are amazing, yummy and fantastic.

I'm making a couple of the recipes this week and the first was last night - Italian fries.

Super easy and they were awesome.

Here you go.

Russet potatoes (for our little family I used 3, but use enough for all the people you're going to feed)
dried oregano
dried thyme
garlic salt
Romano cheese
butter
salt and pepper to taste

heat your oven to 400 degrees and lightly coat a cookie sheet with olive oil.

wash, dry and slice your russet potatoes like french fries.  I left the skin on mine.

arrange your potatoes on the cookie sheet - they can overlap - and generously season with the oregano, thyme and garlic salts.

once seasoned, sprinkle the shredded Romano cheese all over the top.  Then, using about 2 tablespoons of butter, spread little pats of love all around the pan.

coat the top with a little drizzle of olive oil and put them in the oven for about 45 minutes.

At this point, for me, the potatoes were done, but the cheese wasn't yet crusty so I turned my broiler on high and broiled them for about 5 more minutes.

Serve and enjoy.  They were so good I'm tempted to fix them for dinner tonight, too.

Monday, September 13, 2010

Pasta tonight!

Generally, I plan meals in advance so I know what's going to happen in the kitchen when it's time for dinner.

After a busy and sleepless weekend and a day ravaged by allergies and arthritis, I wasn't quite sure what to fix when the dinner bell would start to ring.

After poking around a few recipes I was inspired to make up my own thing.

photo.jpg

It was pasta with bacon and leeks and Parmesan cheese and sauteed chicken.

Phew. Got all that?

Here's the low down if you want to try it on your own.
6 slices bacon, cut into chunks.
2-3 leeks sliced thinly
1/4-1/2 cup white cooking wine
3/4 cup milk (heavy cream would have been better but I didn't have any)
Frozen chicken tenders thawed, about 3 per person
Pasta of your choice (I used penne).


For the Pasta
First - start boiling water for your pasta and cook it following the directions on the package.

1 - slice your bacon and throw it into a hot skillet. Cook until almost completely browned, 5-7 minutes.
2 - remove bacon from the pan and add a tablespoon of butter to the bacon grease and all your thinly sliced leeks. Cook the leeks until they start to brown on the edges and get really soft.
3 - add the bacon back with the leeks and drench in the cooking wine. Let it cook and simmer for about 2 min, then add your milk/heavy cream. Let the sauce simmer until the edges start to boil. Once the boil gets to the middle, turn down the heat and keep stirring.
4 - when the pasta is completely cooked, drain the water and add it to the pan with the bacon and leeks. Stir everything around until it's all nice and happy and let it sit a few minutes so the pasta can soak up some of the sauce.

The chicken
While your pasta and sauce are cooking, start working on the chicken.

In a medium sized bowl add flour and any/all seasoning salts you like. Lightly coat each piece of chicken on both sides with the flour mixture.

Place the chicken in a lightly olive oiled (or buttered depending on how you groove) saute pan and brown it on both sides (3-4 min each) until it's beautifully golden brown.

Put the pasta and chicken in a bowl and enjoy!

Thursday, September 2, 2010

When the kids are sick - make cookies

When other people in my life are stressing me out, I feel an overwhelming need to bake.  Cookies always make things better.

photo.jpg

Sunday, August 29, 2010

The Pioneer Woman: Easy Enchiladas

We tried another PW recipe last week - her beef enchiladas.  Now, I make a mean chicken enchilada and some pretty good sweet pork with green sauce enchiladas but I've never made beef.  We're not huge fans of ground beef in enchiladas and who has the time to cook and shred beef, though that would be tasty too.

No, I used the PW recipe and they were decidedly good.  Good enough that I actually ate the left overs the next night.

Of course, I modified things a bit.  I didn't have onions, but I had shallots so those went into the mix.  I didn't have time to fry and dip my corn tortillas so I just microwaved them individually so that they were hot, soft and pliable.  Also - no olives, but lots and lots of green chilies and cilantro.

Yum, yum, yum.


Photo courtesy of Pioneer Woman

Wednesday, August 25, 2010

The Pioneer Woman: Favorite Sandwich

The Pioneer Woman, Ree Drummond, is my new favorite food person.  I bought her cookbook and am really in love with quite a few recipes.

Last night for dinner we had the sandwich called, Marlboro Man's Favorite.  It was delish.  One of my new favorites as well.  I mean, anything that involves a ton of butter and a three year old will willingly consume scores a gold star in my book.

Try it yourself tonight.

Photo courtesy of Pioneer Woman

Wednesday, August 18, 2010

Rootbeer Cupcakes


I fixed these cupcakes (mine did not look like this, I've lost all my pictures because I deleted the card) for a party and my oh my, they were divine. Particularly the icing. Oh my heavens, the icing.

The recipe is courtesy of one of my new favorite treat blogs, Confessions of a Cookbook Queen. The stuff she whips up is absolutely divine.  Yes, its as easy as the recipe says and yes the cupcakes will end up absolutely soft and fluffy with only a cake mix and some root beer.

Note 1:  I used an entire 12 oz bottle of root beer and maybe it's because I'm at a higher altitude, but I only got about 18 cupcakes, instead of 24.

Note 2:  I double the amount of root beer extract in the icing and added some to the cake batter as well.

INGREDIENTS

1 box white cake mix
1 cup of your favorite root beer
1 recipe butter cream
1 teaspoon root beer extract

Preheat oven to 350. Line 24 muffin tins with paper liners.

Mix together root beer and cake mix (yes, just those two ingredients). Pour into paper liners and fill 3/4 full. 

Bake for 15 to 18 minutes or until cake springs back when lightly touched. Remove from oven and allow to completely cool.

In a separate bowl, mix the butter cream frosting and root beer flavoring. Frost cooled cupcakes.


Butter Cream
Butter, softened to room temperature
Powdered sugar
Vanilla
Milk

Put 2 sticks of butter, 2 tablespoons milk, and 1 teaspoon vanilla in the bowl of a stand mixer.  Whip them all together.  Slowly add powdered sugar (4 cups) and root beer extract, a couple of cap fulls to the butter.  Add a little more milk if it's too thick, a little more powdered sugar if it's too thin.


Enjoy.

Pink Lemonade Cupcakes

pink lemonade cupcakes

I made these for a family BBQ in July. They were yummy. I didn't think that the cake ended up sour enough, so I really went all out with the frosting.

This recipe is not mine, but i tweaked it. The recipe makes just barely 12 cupcakes.

Cupcakes
1 c. flour
1/2 tsp baking powder
1/4 tsp baking soda
pinch salt
1/2 c. sugar
1/4 c. vegetable oil
2 egg whites
1/2 c. pink lemonade concentrate, thawed
1/4 c. buttermilk
red or hot pink food coloring, couple drops

preheat oven to 350 and bake for 20-25 minutes

in a small bowl combine flour, baking powder, baking soda and salt

in a large bowl whisk together sugar, oil, egg whites and pink lemonade. then, alternately whisk in flour mixture and buttermilk, ending with flour, whisking until smooth. add food coloring to make the batter pink.

Pink Lemonade Butter cream
3 c. + 3 tbsp powdered sugar
1 stick butter, room temp.
1/8 tsp salt
1/4 c. pink lemonade concentrate
red or pink food coloring

add butter, sugar, salt, and concentrate in a mixer and mix on low. add food coloring. taste. add more concentrate if not tart enough. More sugar if too thin.

Pipe or spread on cooled cupcakes.

Tuesday, August 3, 2010

Quick Marinade

It wasn't THE most tasty thing in the world, but for a quickie invention, it wasn't bad.

We had steaks for dinner, but not much else.  And, I'm sick so I needed something more flavorful than the average.  And, there is no gas in my grill so I was stuck cooking inside.

To marinade the steaks, I did this.

balsamic vinegar
olive oil
rosemary
roasted garlic - minced
dijon mustard
capers
salt and pepper

Use quantities you're comfortable with.  I love garlic and balsamic so I went heavy on those.  If you've got two small steaks like I had, you'll want about half a cup of marinade.  Because it was a last minute thing, my steaks only marinated for about 10 minutes.  They could have used at least 30 minutes, maybe a couple of hours to really soak up the flavor.

Friday, July 30, 2010

Taking care of people the only way I know how...with food.

A couple weeks ago a good friend of mine had a baby.  At home.  In her bathtub.  On purpose.

She's been a bit AWOL from life since and I finally talked to her a little yesterday via text message and she agreed to let me take her dinner and hold her sweet baby boy.

While I was fixing the meal for her and her husband tonight I realized that whenever I want to help someone, I show up with food.  I use food for everything.

I'm not the best at telling people I love them, but I can make them cookies.  I'm not really good at helping people with their lives, but I can and will make them dinner.  It just seems to be the way that I feel I can fit in and help the best.

Food is so good for so many reasons.  Love, therapy, a helping hand, a night off for someone.  I'm really learning to love cooking and being in my kitchen - even if I have some helpers with grubby hands every once in a while.

I guess food is good therapy for me, too.

Saturday, July 17, 2010

Tin Foil Dinners

Last week I went camping with a youth group. Just an overnight-er. When I found out that for dinner, we'd be consuming tin foil dinners, I was ecstatic. I LOVE THIS! I thought.

Awesome.

That was, until, I saw them. The person in charge had cooked all the ingridients SEPARATELY the night before. Then they were combined, wrapped in foil, stuffed into a cooler, and had buckets of ice dumped over the top.

When they were taken out of the cooler to be "warmed up" on the hot coals they were dripping with watter and soggy.

And, the ground beef was chopped up and crumbled on top like a condiment.

ick.

ick.

double ick.

I left camp to "run an errand" and stopped at the local McDonald's for dinner instead.

Since then however, I've felt the need to consume such a feast in foil. The other day with my trusty three year old assistant chef, we set out to make the best and most seasoned (thanks to the helper) tin foil dinners on the planet.

our ingredients:
ground beef
onions
green onions
Yukon gold potatoes
red bell pepper
every single salt and seasoning we could pull out of the pantry in one armful.

We cut and sliced and molded. We sprayed the foil, gently laid out our ingredients and went out to the grill.

no gas.

in the grill.

The husband never turned the switches to "off" after our last BBQ event. He also never turns the propane off (no righty tighty in his book).

Thank heavens the house didn't burn down.

That left me with 2 beautiful packets of food and no BBQ.

We headed back indoors, my assistant and I and put our dinners in the oven at 400 degrees for nearly an hour.

They could have used another 20 minutes.

I had to zap them in the microwave for a bit but the final result?

Absolutely scrumptious.

I love tin foil dinners....even if my effort were

well

nearly......

foiled!

Monday, July 12, 2010

Food Party Favors

My cousin is getting married in one month. On Saturday, my aunt threw a bridal shower for her soon to be daughter-in-law. I volunteered to help with a few things, one of which was the party favors.

The shower had a kitchen/grocery theme so I knew that the favor needed to be food oriented. When my original idea didn't quite pan out, while wandering around cost plus world market I found these great old fashioned sodas and was inspired to use them for the shower favor.

photo.jpg

Not being too crafty or creative, I didn't think until later about making a cute label to cover the soda label or anything like that. I did whip up a festive sticker to put over the yummy chocolates that I attached with a ribbon. That was about as creative as I got.

photo.jpg

The sodas however were a hit - and I seemed to manage to get a flavor to fit everyone's taste (black cherry, grape, orange, chocolate, cola, key lime, lemon lime and root beer).

It's always fun to do a project - especially one that involves a little bit of sugary goodness.

Thursday, July 8, 2010

Do you want fries with that?

Last night was one of those nights - a little too much fried food for my stomach, but everything still tasted good going down.

The main dish for dinner last night was chicken fingers.  Home made chicken fingers are honestly better than anything in a restaurant, when made well anyway.  I've invented my own methods, but last night's were some of the best I've ever made.

photo.jpg

I start with frozen chicken tenders - thawed out of course.  Thaw out as many as you need but in our house with two grown-up eaters and 1 pint size eater, we usually need 6-8 tenders.

Once they are thawed and your ready to bread them, pat all the chicken pieces with a paper towel to dry them out.

Next, soak them for 2-4 minutes in buttermilk.  Yes, buttermilk!  Regular milk works fine, but buttermilk is so thick that it's the best.  If I use regular milk, I usually end up breading twice, but with buttermilk I only had to do it once.

While the chicken is soaking in buttermilk, get your flower dredge going.  I use regular flour but I happen to have some self-rising flower so I used that last night.  It was good.  I'll use it again.  In the flour I add my seasoning: salt, pepper, garlic salt, chili powder, something I've got called "fiesta" seasoning and anything else that sounds good.  GENEROUSLY add the flavor to your flower.

Once the dredge is mixed, the rest is simple.  Take the chicken out of the buttermilk and coat it with the flour.  Work in batches of 3-4 at a time so that the flour doesn't get all goopy on the chicken.  Once you've got 4 done, add them to the oil.

I use regular vegetable oil in a very hot skillet.  You don't need a lot of oil - you don't want to submerge the chicken.  Just enough oil to brown it one side at a time.

That's it.  Maybe one day I'll try some beer battering like most restaurants do, but until then, these are a crowd pleaser every time.

Friday, July 2, 2010

Chocolate Ganache

I'm an absolute chocoholic.  I actually really do each chocolate every single day.  The darker the better, but any chocolate will do on most days.

One of my best chocolate loves is ganache.  It's easy to make, decadent to indulge in, and pretty versatile, too. And, you can use it for a lot more than truffles.

IMGP4723

I've used ganache to "frost' a cake. I love doing this because when it hardens it's so shiny and smooth. All you do is drizzle it over the cake after it's cooled for a bit. It will take a few layers (and I'm not a professional so it never looks that great even though it tastes divine) to cover an entire cake.

I've also whipped it up and used it as icing. That way, it's like a chocolate mousse - really light and airy on top of a cupcake or cake. This is great because then the cake can be absolutely rich without the icing being too heavy, too. Once the ganache has cooled at room temperature for a couple of hours, or sped up in the fridge for about 30 minutes start whipping, just as you would for whipped cream from scratch. It will take some time so be prepared to stand with your electric mixer (I prefer a hand held mixer to my kitchenaide for this.).

photo.jpg

So, how do you make a chocolate ganache? It's so simply.

You need equal parts heavy cream (whipping cream) and chocolate (16 oz cream and 16 oz chocolate). For ganache, like a chocolate mousse, you don't want to use a semi-sweet and definitely not a milk chocolate. The consistency of the chocolate just isn't right. You need a bittersweet or even a dark chocolate to make it all work out well.

Go ahead and whip some up today.

Wednesday, June 23, 2010

When a friend gives you peppers

It's already Wednesday and we haven't been to the grocery store this week.  We went on Saturday for Father's Day Feast supplies, but the basic weekly staples are elusive.  In fact, I don't even remember what we ate for dinner on Monday night.  How crazy is that!

The other day, a good friend whose got produce connections, set me up with a giant bowl of peppers.  Ooooohhhhh, peppers!  We'll be eating them for the rest of the week for sure but last nights' dinner with them was pretty tasty.

Like I said, we haven't been to the store.  All I really had int he fridge was a piece of meat (Tri-tip steak), some shallots, cilantro, and oh yeah, the peppers.

We settled on steak fajitas.  The steak was grilled and sliced thin.  The peppers were sauteed with the shallots.  Cilantro was sprinkled on top as a finishing touch.

The end result turned out pretty tasty.

Sunday, June 20, 2010

Father's Day Feast

Every Sunday we enjoy dinner at my parents house.  It's something I look forward to for the entire week.  On a few ocassions however, I invite the fam. over to my house for Sunday dinner.  Today being Father's Day, I decided that it would be a good time for such an invitation.

Today's Menu:
Baby Back Pork Ribs
Warm Potato Salad (with no mayonaise)
Corn Salad with Green Onions and Vinegar Dressing
Green Salad
Sourdough Rolls

Cookie Dough Cupcakes for Dessert

Wednesday, June 16, 2010

Weekly Menu

Monday: Chick-fil-a (it was a long day with an impromptu basketball game in the evening)
Tuesday:  Mongolian Beef
Wednesday: Pasta with pesto and chicken
Thursday: Salad with chicken, craisins, apples and anything else I throw in.
Friday:  Pork enchiladas with rice

Saturday, June 12, 2010

The perfect onion ring


I'm a sucker for a good onion ring.  French fries are usually my first choice when going with a greasy side,  but a good onion ring?  It's part of food nirvana-land for me. 

Now, there are a few places around town to get good onion rings but making them at home has always been a challenge for me.  I've bought the packets of mix at the grocery store and made up my own recipes and nothing ever really seems to work out. 

That was, until this week.  I had buttermilk in my fridge and some self-rising flour in the pantry.  After reading a couple of recipes and knowing that I had some good onions in the crisper I embarked on an onion ring adventure.

First, I sliced those onions as thinly as I possible could.  Nothing more gross that a fat, slimy onion ring.  Next, I put the onion slices in a bowl of buttermilk and let them soak.  While they were soaking, I made a quick seasoning mix:  self-rising flour, cayenne pepper (I was brave and used a little more than I thought I should), garlic salt, some all purpose "fiesta" seasoning, salt and pepper.

How did I know if I got enough flavor in the flour?  I didn't but my rule of thumb was to make sure that the flour wasn't stark white - that the color had changed a bit because of everything I added.

So, the onion slices went from the buttermilk, to the flour mixture, to a cookie sheet covered in wax paper with a thin layer of flower to keep the onions from sticking.  Once I had most of them ready, I started to fry.

We don't fry much in our family.  In fact, we don't fry anything, but the occasional chicken finger and that's in just a little bit of oil.  Our french fries are always baked and just a few months ago we gave our fry daddy (a seven year old wedding present never opened) to good will.

I never really know how hot oil needs to be, but I just started dropping my rings in and adjusting the temperature as necessary.  One thinly sliced onion makes a lot of rings, by the way.  Once they were golden brown, I took them out of the oil, placed them on a plate with a bunch of paper towels and gave them a final dusting of salt.

Holy crap!  These suckers were good.  They were so good that I fixed them for dinner the next night and ate almost an entire onion by myself.

We ate them on steak sandwiches and hamburgers.  They were also excellent plain.  I'm not sure what to "dip" onion rings in, but they were seasoned well enough, especially the second night, that they were just super tasty all on their own.

Weekly Dinners: June 7-11, 2010

Last week I came up with this great idea; to select a cook book and plan my weekly meals out of the cookbook for some variety and new dishes. Brilliant, right?

The dinners for this week, though not completely following the recipes, were Jamie Oliver inspired.  I've got an old cook book of his and didn't really like the recipes in it, but put a twist on a few for our family this week.

The other theme for the week, that came about after the fact, was onion rings.  More on that later.

Monday:  Chicken Fajitas (garlic and lime)
Tuesday: Cheese steaks (this was Jamie Oliver inspired - used a rib eye steak pounded flat instead of thin sliced deli meat.  Much, much tastier.)
Wednesday: Burgers and fries and homemade onion rings
Thursday: Breaded pork chops and green beans
Friday:  was supposed to be pesto pasta but ended up being Smash Burger instead (and for me, more onion rings)

Saturday, June 5, 2010

Baked Goods

June 10

My friend Erin asked me to help her out with a few treats for a bridal shower. She's trading me food for hand crafted items for my home. She is extraordinarily talented and I'm so excited.

The theme of her party was lemon and lime.  I was happy to oblige with Key Lime cupcakes, Tart Lemon cupcakes and cookie dough truffles in the theme colors.

The party went of without a hitch and I'm told the treats disappeared quickly.

I love baking, especially with a theme.

Thursday, June 3, 2010

Weekly Menu - Weight Watchers Style

I borrowed a WW cookbook from a friend.  I can't say that I love all the recipes, but the couple we've tried this week have been good.  The recipes are a little on the bland size, and it's been a shock for us to see some portion control in effect, but overall, pretty tasty.

Monday - Memorial Day holiday - salads from Wingers
Tuesday - Spicy beef stir fry with tangerines
Wednesday - Chicken breasts (broiled) with an orange-mustard glaze
Thursday - Sweet and Sour Chicken (with pineapple, red pepper, and snap peas)
Friday - I'm working at Shavy Jones with my brother so the boys will fend for themselves.

Saturday  - our favorite risotto

Friday, May 28, 2010

Pasta with Bacon and Shallots

First, let me say this.  I once saw an episode of Anthony Bourdain's show on the travel channel.  I don't remember where he was or what he was eating, but he basically said that the difference between regular old people and people who know how to cook is their use (or lack thereof) of shallots.

Yes.

Shallots.

It seems that in our house at least one meal a week has the lovely purple shallot as a main ingredient.  I love these little onions.

This pasta dish is quick to whip up and sure to delight.  The ingredients are simple:

4-6 slices of thick bacon
1 whole shallot
1 cup milk
frozen peas
enough pasta for 2-4 people

The steps are as easy as the ingredient list.
1.  slice your bacon into small pieces and cook it in a large pan (not a skillet).
2.  remove bacon and cook your thinly sliced shallot in the bacon grease until the pieces are soft and beginning to brown.
3.  Add 1 cup milk to the shallot and bacon grease and stir until the milk starts to simmer.
4.  Once your sauce starts to simmer (it will happen quickly), turn down the heat, add your frozen peas, and give everything a stir.

This whole process takes about 15 minutes.  Long enough for you to boil water and cook your pasta.  Once the sauce is done, and your pasta is cooked and the water is drained throw your pasta into the sauce pan and mix it all together.  Let it stand a few minutes (leave the heat on very low if you'd like) so that the pasta starts to soak up the sauce.

Serve, top with bacon and enjoy.

Side Note: 
*Adding chicken to this dish is a nice touch, if you feel it needs some more protein.
*You can cook your shallots separate of the sauce, removing them from the pan before you add the milk and peas.  As they cool, they'll get crunchy adding a layer of texture to the dish.  You can just sprinkle them on top with the bacon when you're ready to serve.

Sunday, May 23, 2010

:: weekly menu :: may 23-29 ::

sunday :: sushi rice bowls ::
monday :: pizza on the grill ::
tuesday :: mediterranean mac + cheese ::
wednesday :: thai chicken + noodle salad ::
thursday :: chicken enchiladas ::
friday :: huevos wrap cheros ::
saturday :: broiled pork tenderloin ::

option 1 :: natural lasagna ::

pretty sure it won't go down like this, especially with a bertolli and several frozen pizzas in the freezer.

Friday, May 21, 2010

Pasta dinner for four.....or more

I enjoy cooking for other people.  It's not something that I've always been able to say that I enjoy.  In my life right now however, I like it.  Cooking, baking. Food means a lot to me and so does sharing it with family and friends.

About a year ago I found a great baked pasta recipe.  After dozens of times making it, I dare say I've perfected it.  We had it for dinner the other night - and shared the batch with my sister's family.  If you ever need to fix dinner for someone else, but need dinner for yourself as well, this recipe is for you.  Or, if you just want to be a tad bit lazy - cook the recipe and eat one for dinner and freeze the other.  A second nights dinner for next week is already in the freezer.

Warning:  From start to finish, before baking, it takes about an hour.  A labor of love I tell you.

Here are your instructions:
1- Boil 1 lb. of penne pasta.  Leave it al dente so cook it a few minutes less than the instructions say.
2 - While your pasta is boiling, cook some bacon in a big skillet.  4-6 slices will do, depending on how much bacon you like.  Before cooking it, cut it into small pieces.  This will speed up the process and then you don't have to cut cooked bacon.
3 - Remove the bacon from the grease and cook 10-12 chicken tenders or 4 chicken breasts about 90% in your bacon grease.  (I never said that this recipe was perfectly healthy now did I?)  You don't want your chicken pink anymore, but don't cook it all the way or they'll dry up in the oven.
3 - While your bacon and chicken are cooking, cut up some sun dried tomatoes.  I use about 12 but that's because I like them.
4 - Once the bacon and chicken are cooked set the bacon aside with the tomatoes and slice the chicken into small chunks.  Set it aside as well.

5 - Now, in a really big, tall pan your going to make the sauce.  You start by making a rue (a fancy French sauce base).  For your rue, you'll need (gulp) 6 tablespoons of butter.  Melt the butter in your pan.  Once the butter is melted add 1/2 cup plus two tablespoons of flour and 2-3 teaspoons of minced garlic.  Mix all this together with a whisk.
6 - Once your rue looks like a paste, start adding milk.  You will add a total of 6 cups of milk (whole, 2% or 1%.  NOT SKIM!), one cup at a time.  You'll need to constantly whisk this so that the rue paste breaks up in the milk.
7 - After adding all the milk, continue whisking until your sauce comes to a simmer.  Once it's simmering add your bacon and sun dried tomatoes.  Cook for one minute, stirring with a wooden spoon.
8 - Next, turn off the heat and add the cheese.  1/2 cup of grated Parmesan and provolone.  Stir until the cheese melts.
9 - The final step is to add the chicken pieces and the pasta (remember I told you that you needed a really big tall pot?) and stir until all the pasta is coated with the sauce AND the tomatoes and bacon appear to be evenly distributed.  Sprinkle the top with Parmesan cheese

Pour the pasta mixture into to baking dishes, each smaller and deeper than a traditional 9x13 cake pan.  Dare I say a good casserole dish?

Bake at 400 degrees for 20 minutes until golden brown.

If you are cooking from the freezer, bake at 400 for 35-40 minutes.

Serve with brushetta and crusty bread.  Which by the way, is great for a leftover lunch the next day.  Especially when you ate all your pasta at dinner the night before.

Tuesday, May 18, 2010

Weekly Menu 5/17-5/21

Monday - Cafe Rio (we just got back from being out of town and almost literally had no food in our house)
Tuesday - Pork chops, green beans, and yellow potatoes
Wednesday - Baked pasta with garlic bread
Thursday - Tin foil dinners on the grill (hamburger, potatoes, onions, and carrots
(we didn't have any tin foil so instead we had hamburgers and fruit and potato chips)
FridayPasta with bacon and shallots (plans foiled again.  Too tired and too many bugs in my house.  we ordered a pizza and had it delivered.)

Tune in for next week's menu - I'm going to try and do the whole week (much to the chagrin of my husband, I'm sure) from a Weight Watchers cook book.

Rainbow Brite

I came across this cake today.  Not only is it one of the most beautiful things I've ever seen but the thought of making it both thrills and terrifies me at the same time.

I found the pictures at Twig and Thistle, here.

The instructions for baking can be found on Whisk Kid,  here.

If I actually dare make it, I'll let you know.

Monday, May 10, 2010

Mexican Fiesta!

Yesterday was Mother's Day.  We had a huge family party, thrown together last minute by my mom, for the celebration.

We decided on a Mexican fiesta to honor all our mothers.

The food was fantastic:
chips and 2 kinds of homemade salsa
sweet pork tacos
beef tacos
chicken with green chilies and corn tacos
chicken enchiladas
lime cilantro rice

There was more side stuff but I can't remember. 

And the dessert bar was almost a mile long.

What a foodie family I've got.

I contributed a few items to the pot-luck buffet, but the tastiest by far were my home-made crustos.  I don't know what you really call them, but the local taco joint calls them crustos.

deep fried tortillas drenched in cinnamon and sugar.

So good.  They disappeared pretty fast yesterday.  I guess I should have made more.

Saturday, May 8, 2010

Cake Mix Cookies


I learned from the mom of a friend about 9 years ago how to make cookies out of a cake mix.  it was a revolutionary food concept to me, and probably because it produces some of the tastiest cookies around, became an addiction for me as well.

Cake mix cookies are so yummy, so fast, and so easy it's a wonder I don't literally make and devour them every single day.

All you need to do is:
1- select the cake mix of your choice.
2 - open said cake mix and dump it into a bowl.  Add one egg and a stick of melted butter.  Stir.
3 - add your extras of choice - I tend to always use chocolate chips.  Mix and taste the dough.

Bake these cookies in a 375 degree oven for 5-7 minutes.  Do not over cook them.  You want them to still be super squishy and soft when you take them out of the oven.  They will stay soft for days - though they won't last that long.

My favorite cake mixes?
Cherry Chip
Yellow
Milk chocolate or German chocolate

Thursday, May 6, 2010

Smokey Shredded Beef Tacos

Another Martha Stewart recipe that makes a regular appearance in our dinner rotation.

I don't follow the recipe exactly, but it always turns out pretty darn good.

Start with a big oven safe dutch-oveny sort of pot/pan.  Make sure that you actually have the lid because you'll need it.

In the pan combine the following ingredients with a whisk.
1/2 c. ketchup (gross, I know but it works)
1 c. water
2-3 tbsp. chilies in adobo sauce (this is where the smokey and the spicy come from)
3 tbsp. minced garlic
couple shakes of onion powder
coarse salt
pepper

Next, add the meat.  You'll want a medium sized pot roast for this.  Cut it into four equal sections and set it down into the mixture in your pan.

Bake at 350 degrees for about two and a half to three hours.  Once cooked, shred the meat and put it back in the pan so it can soak up all the juices.

Enjoy with whatever you like to eat tacos with: rice, salsa, chips, sour cream, cheese, etc.

Monday, May 3, 2010

Weekly Menu

I make my dinner list and my grocery list on Saturday.  We shop on Monday night.  That way, I know ahead of time when our menu has a gap - like a family party or a grumpy mom night, that sort of thing. 

Monday - Lemon and oregano sauteed chicken with pasta and garlic bread
Tuesday - Honey baked ham, garlic mashed potatoes, green beans in brown sugar
Wednesday - Smokey beef tacos
Thursday  - Burgers after my brother-in-laws college of nursing graduation
Friday  - pasta with meat sauce or out to dinner (we've got a b-ball game to hit at 6:00 pm, right at dinner time)
Saturday - Family dinner - I don't have to cook.  Yeah!
Sunday - Happy Mother's Day - Mexican fiesta at my grandma's house  I'm bringing chicken with green chilies and sweet corn.

Friday, April 30, 2010

Korean BBQ Beef Wraps

Korean BBQ beef lettuce wraps.  Yummy

When we bought our house a little over 5 years ago my husband insisted on using a realtor. I wasn't a fan of the decision. In fact, I'm still not today. The only thing I enjoy(ed) out of the situation is that every month when she sends us a postcard in the mail, it has a recipe on it. A few months ago the recipe was for these wraps. They are divine in a "I love meat" sort of way.

Because I don't have the recipe card in front of me, I'm going to do a little guestimation on the actual ingredients. Give it a try though - your tummy will thank me for it later.

Korean BBQ Lettuce wraps:
rice
romaine lettuce
1 flank steak
1 kiwi

Cut up and smash the kiwi. Smear the kiwi all over the flank steak and let it sit for 10-15 minutes.

While the steak is steeping, make the marinade.

1/3 c. soy sauce
3 tbsp red wine
3 tbsp sesame oil
3 tbsp corn syrup (Karo syrup, etc.)
3 tsp minced garlic
1 tsp onion powder
1/4 c. brown sugar

Mix the marinade. Place the steak and marinade in a zip lock bag. Let marinate for at least 30 minutes. I prefer all day long.

Once everything is ready - cook the steak (grill, frying pan, etc. It's all good) and slice it up as thinly as you can.

While the steak is cooking, boil the remaining marinade (get rid of the kiwis) to make the sauce for the wraps. Also, cook some white rice and get some romaine lettuce leaves ready for wrapping.

Serve the wraps with green onions, thin carrot strips and toasted sesame seeds.

Note: A medium to large flank steak should serve about 8 people. It doesn't go that far however in our house of large carnivores. Don't plan on any leftovers and if you are having guest over for dinner - maybe double everything.

Tuesday, April 27, 2010

How to doctor a cake mix

I love to bake.  It's cathartic for me.

Many times I've baked a cake from scratch - and made a huge mess in the process.

I'm learning though that doctoring a store bought cake mix is faster, easier, and often just as tasty.

A few things you can do to make a cake from a box taste more like a cake from scratch.

1 - add a small package of instant pudding in a flavor that compliments the cake mix
2 - add one cup sour cream
3 - use buttermilk or milk instead of water

Not only is the batter absolutely fluffy, rich, and quite heavenly, but it bakes up well, too (but it does take a bit longer than the instructions on the box tell you so watch carefully.).


My first attempt at a doctored mix turned out fabulous.  I had a regular yellow cake mix, did all of the above and for my pudding added a white chocolate instant pudding.  I never actually got to eat one of the finished products but the batter was enough to satisfy my sweet tooth for the day.

Monday, April 26, 2010

Weekly Menu

Monday - Chicken Parmesan (we didnt' actually eat this last week.  We went out for pizza instead. ) with Caesar salad and crusty garlic bread

Tuesday: Garlic, lime and soy pork tenderloin with crispy garlic potatoes

Wednesday: Korean BBQ beef wraps with romaine and rice

Thursday: Lemon grilled chicken and something else on the grill

Friday: Baked penne pasta with chicken, bacon, and sun dried tomatoes

Sunday, April 25, 2010

Chocolate Chip Cookie Dough Truffles


I found this recipie on a blog (vanillaandlace.blogspot.com) and printed it out immediately, just waiting for the right even to try out such a seemingly decadent treat.

My sister's baby shower two weekends ago was the perfect time for such absolute heaven wrapped in chocolate.

Here is the recipie:
Chocolate chip cookie dough truffles
makes 3-4 dozen, depending on size. (I got 50 truffles out of the batch I made)

2 1/2 cups all purpose flour
1 teaspoon salt
1/4 teaspoon baking soda
1 cup (2 sticks) butter or margarine, room temperature
3/4 cup granulated sugar
3/4 cup packed brown sugar
1 teaspoon vanilla
1/3 cup milk or soy milk
1 cup mini semi-sweet chocolate chips, or small chocolate chunks.

14 oz dark chocolate candy coating, (i didnt have any so i used chocolate chips)

Directions

Beat butter and sugars and in large bowl with electric mixer on medium speed until light and fluffy. Add soymilk and vanilla. Stir in flour, baking soda and salt and mix on low speed (or by hand) until incorporated. Stir in chocolate chips.

Cover and chill dough for 1 hour.

When dough is firm enough to handle (it may help to lightly flour your hands), form dough into 1″ balls and arrange on a baking sheet lined with waxed paper. Place sheets in freezer and let chill for 30 minutes.

Melt chocolate candy coating in a double boiler or in microwave according to package directions. Using forks or a dipping tool, dip cookie balls into candy coating to cover. Tap fork on side of pan to remove any excess coating, and return to waxed paper-lined baking sheets. Chill until set. Store, chilled, in an airtight container for up to 1 week. Or freeze for frozen treats.

Wednesday, April 21, 2010

Leek, Bacon and Pea Risotto - a new family favorite

image courtesy of Everyday Food
We discovered this recipe from an old copy of Everyday Food about a month ago and have fixed it several times since.  I'm not a big fan of cheese in general so I let everyone add there own Parmesan depending on personal preference.  We've also tried it with and without peas and the peas really make a difference so I highly recommend that you throw them in at the end.  Though I may not be a cheese fan, I do love me some thick, smoked bacon so I add an extra slice to the recipe - for the flavor.

Oh yeah, and I don't do the wine, not something I keep handy in the house.  I just use an extra cup of chicken stock.


I haven't fixed the whole recipe yet - cutting it in half is just perfect for our little family.  Only the grown-ups eat it anyway.

Serves 4
  • 2 leeks, white and light-green parts only
  • 12 cups (96 ounces) low-sodium chicken broth
  • 4 slices bacon, cut crosswise into strips
  • 2 1/2 cups Arborio rice
  • 1 cup dry white wine
  • 3/4 cup frozen peas (optional)
  • 1/2 cup finely grated Parmesan, plus more for serving
  • 1 to 2 tablespoons fresh lemon juice
  • Coarse salt and ground pepper

Directions

  1. Halve leeks lengthwise; rinse thoroughly. Pat dry; thinly slice. In a saucepan, bring broth to a simmer over medium. Meanwhile, in a large, straight-sided skillet or Dutch oven, cook bacon over medium, stirring, until lightly browned but not crisp, 5 minutes. Add leeks; cook, stirring, until softened, 2 minutes. Increase heat to medium-high. Add rice and cook, stirring, until translucent around edges, 1 minute.
  2. Add wine and stir until evaporated, about 2 minutes. Add 1 cup broth. Reduce heat to medium-low and cook, stirring, until broth is absorbed, about 2 minutes. Repeat process, gradually adding broth, until rice is al dente and risotto is creamy (you may not need all the broth), about 35 minutes. Stir in peas (if using) after the final addition of broth.
  3. Remove skillet from heat and stir in Parmesan. Cover and let stand 2 minutes. Season risotto with lemon juice, salt, and pepper. Reserve half the risotto (about 4 cups) in refrigerator for risotto cakes. Serve remaining risotto with Parmesan.

Weekly Menu 4/19 - 4/24

Monday: Chicken tenders Parmesan
Tuesday: Hamburgers on the grill (chips and dip and grilled pineapple on the side)
Wednesday: Leek, bacon and pea risotto
Thursday:  Taco night with Spanish rice
Friday: Breaded pork chops with lemon and green beans