Pages

Tuesday, December 20, 2011

Nutella Buttercream

Note to self:  nutella frosting straight out of the fridge taste like fudge on ecstasy.

I had to make cupcakes the other day on sort of short notice with little time to do anything really fancy. I settled on the old go to - vanilla bean cupcakes and chocolate frosting - but decided to throw the chocolate icing a little twist.

I added nutella.

Is your mouth watering now?

There was enough of the stuff left over after piping it onto my cupcakes that I saved it in the fridge.  And, lucky for me, a little low blood sugar later and I was able to dive right into that frosting for a quick boost of glucose.

It tasted like fudge.  On ecstasy.

Absolutely divine I tell you.

Go ahead and make some for yourself today.  Just make a basic chocolate butter cream but add 1/2-3/4 nutella into the mix.

Thursday, December 15, 2011

Fancy cookies

Oreo cookies.

I only like them two ways.

Dunked in milk or covered in chocolate.


Chocolate covered oreo cookies. The only thin that has worked right for me today.

I ate dinner with the family a couple weeks ago at Zupas and they were selling a box of 8 chocolate covered oreo cookies for $10.  That's more than a dollar an oreo.  Now, I'm sure they used more expensive chocolate than me but come on - $10?

I made these the other day for a couple of neighbor and teacher treats.  They are super yummy.  Half dipped in red vanilla flavored candy melts and the other half in milk chocolate.

Maybe if I decided to sell them, I could make a pretty penny.  I decided to eat them instead.

Thursday, December 8, 2011

photo.JPG

At the end of the summer we headed to Ogden for a football game and decided to spend the night and make a quick family getaway weekend out of it.  In the morning the family and I went to the farmers market and it was there that I encountered a hand made mint limeade.  It was made in a mason jar by this super cute hippy guy and I could have stood in front of his booth and drunk one all day long.

Since the beginning of September I've been trying to copy the recipe with little success.  However, over Thanksgiving weekend I found a recipe for a basic limeade and then I went to town creating my own.

The perfect mint limeade.

Here's what you'll need to make 2 quarts of most refreshing drink around:
1 cup fresh lime juice
1 cup sugar (I used raw, pure cane sugar (that's why it's brown) but you could use whatever you'd like.)
6 cups water
10 mint leaves, bruised
crushed ice

Add the water, lime juice, and sugar to a pitcher.  Wash mint leaves and rough them up a bit in your hand or on a cutting board.  Add the mint leaves and mix everything together.  Put some crushed ice (the Ice Berg, Sonic, and Hires sell theirs) and add the mixture to the ice.

I promise you will drink the entire 2 quarts.

Cherry Dump Cake

Cherry dump cake for dessert. Yum!

In our family, we love us some good cherry dump cake.  It's one of the richest, yummiest things to eat and oh so easy to make.

Here's what you'll need for a 9x13 size pan:
2 cans cherry pie filling
2 teaspoon almond extract
1 yellow cake mix
1/2 cup butter

Spray your 9x13 pan with a cooking spray.  Open the cans of cherry pie filling and add 1 teaspoon of almond extract to each can.  Dump both cans of cherry pie filling into the prepared pan.  Open the yellow cake mix and dump the mix on top of the cherry pie filling, covering it evenly.  Melt 1/2 cup butter and pour over the cake mix.

Bake at 350 degrees for 20 minutes and then check on the cake.  The top needs to be browned and a little crusty.  If it's not quite ready, bake in additional 5 minute increments until it's ready to eat. 

It's best served with a cold scoop of ice cream on top, but would also be great with some home made whipped cream.

Orange Chicken

Orange chicken for dinner. I wish I knew how to photograph food.

Panda Express sells it's orange chicken sauce at the grocery store.  I don't do much grocery shopping, my husband does, but a few weeks ago I ended u going to the store and happened across the aisle with the sauce and picked up a bottle.  Can I tell you, the sauce is heaven.

The other night I wasn't really sure what to fix for dinner.  I had chicken, a red pepper, some frozen green beans and some onions.  Voila!  Orange chicken in the making.  And if I do say so myself, it was delicious.

What you'll need:
Chicken
Cornstarch
Red pepper
Green beans
Onion, diced
Carrots, if you have them
Rice
Orange sauce

First, cut the chicken up into small chunks or strips.  Put the chicken in a zip lock bag and add a couple table spoons of cornstarch.  Shake the chicken in the cornstarch until it's completely coated and let it sit for 5-10 minutes.

While the chicken is resting in the cornstarch, start prepping your veggies any shape or size you'd like.

Heat up a skillet (or a wok if you've got one) and add enough vegetable oil to coat the bottom of the pan.  When the pan and oil are hot, gently add the chicken and let it cook on one side until it gets golden brown.  Flip the chicken and brown the other side.  When the chicken is finished, remove it from the pan, dump the excess oil and add the vegetables.  Cook the veggies to your liking.

Once the veggies are cooked, add the chicken and the orange sauce back into the pan and let it simmer for about 5 minutes so that the sauce really penetrates the chicken and the veggies.

Serve over rice with a little soy sauce on the side.

Monday, October 24, 2011

Fast and Easy Puff Pastry Dessert

Though I love to eat stuff that is decadent and insanely caloric, sometimes a treat that is a little bit lighter is in order.  That's where this puff pastry treat comes in.

Here's what you'll need:
2 sheets frozen puff pastry, thawed
nutella
egg wash (1 egg + 1 tbsp water)

First, thaw out the puff pastry sheets and cut each sheet into 6 equal rectangles.  On each square, add about a tablespoon of nutella.

photo.JPG

Next, wet the edges of each square of pastry, fold it over and press the edges together with a fork.  Once ever rectangle has been folded and pressed and placed on a cookie sheet, pierce each piece a couple of times with a fork and brush on your egg wash.

photo.JPG

Place in a 400 degree oven for about 16 minutes (start watching them at 10 minutes just incase your oven is a bit hotter than mine). Once golden brown on the top, take them out of the oven, dust with powdered sugar and eat.

photo.JPG

I of course chose to fill my pastry with nutella, but I'm sure you could substitute a little bit of chocolate heaven for something else - jam, fruit, even something savory might be fun to try.

Tuesday, August 9, 2011

Seasoned Oyster Crackers

Seasoned oyster crackers
Back story: Right after Ross and I got married, we lived in student housing at the University of Utah while he finished his MBA. We were in a regular ward that met in the awesome little chapel just across from presidents circle up by the "U" and were called to be on the activities committee with this awesome lady named Marilyn. She was cool. She called the refrigerator the "re-fridge". It cracked me up all the time - not sure why but it was funny.

One of the activities we helped to plan was the annual chili cook-off. It was a big deal in this ward. I don't care for chili, but Marilyn brought seasoned oyster crackers. I was completely addicted to them. She brought gallons of them for the cook-off and I asked ever so kindly if I could take all the left-overs home. She said of course and I was in cracker heaven for a good week after the party.

 I totally forgot about the crackers until a week or so ago and then headed out to find a recipe. The following, from epicurious came pretty close so I tested it out and...voila!

Marilyn's crackers.

I've nearly devoured the entire bag.  I just can't stop.

Give them a try and you will wow yourself and everyone else who gives them a whirl.  Mix the ingredients up, and shake the mixture with the crackers.  Let the crackers dry on some paper towels for about 30 minutes and then put them in a clean air tight container.  The longer they sit, the better they taste.  They're good for a week, but they won't last that long.


  • 3/4 cup vegetable oil
  • a 1-ounce package powdered ranch salad dressing mix
  • 1/2 teaspoon lemon pepper seasoning
  • an 11-ounce package oyster crackers (about 6 cups)

  • Wednesday, June 29, 2011

    Corn Salsa

    IMG_2702

    One of my most favorite things to eat is a Barbacoa Fajita Burrito from Chipotle. I'm a total wimp when it comes to bringing on the heat, but I honestly cannot get enough of the corn salsa (the medium salsa) that they will put on my burrito.

    After some investigating, I found a couple knock-offs and just did my best to combine what I liked. The grown-ups in our house devoured the stuff.

    "Chipotle" Corn Salsa
    12-14 oz. cooked corn (I used frozen but cannot wait until the end of July when real corn is in season and I'll roast it first)
    1 small red onion
    2 jalapenos (no seeds or veins for mild, add veins and seeds for heat)
    2 small vine ripe tomatoes (you could probably do without these if you wanted)
    1/2 cup chopped cilantro
    Juice from 2 limes
    Salt and pepper to taste

    Chop, mix, chill for a couple of hours.

    Eat it all in about 10 minutes.

    Thursday, June 16, 2011

    A little bit of baking

    May was a big month for baking in our house. Here are a few of the tasty treats.

    photo.JPG

    First up, pink lemonade cupcakes for a friends, daughters birthday. After a lot of tasty experiments, I ended up using a white cake mix, doctored up with my secret doctoring concoction, with an additional ingredient of almost an entire can of pink lemonade concentrate into the batter.

    And the frosting, a basic butter cream with about 1/3 cup of thawed pink lemonade for extra pucker.

    photo.JPG

    For my mother-in-law's birthday I went with a chocolate caramel cake. The trick to making this one absolutely delish....almost 24 hours in the refrigerator. There is just something about a chilled cake that makes it so much more dense and wonderful. Try it next time, you'll be absolutely amazed.

    photo.JPG

    Next up, the husband's birthday. For this we went with a rich vanilla cake and milk chocolate frosting. Holy cow it was yummy.

    photo.JPG

    The most fabulous creation was next, for my birthday. I wish that I would have taken a picture of the inside of this cake, it was gorgeous. I wanted a cake that tasted like a chocolate malt so that's just what I fixed. I started with a yellow cake mix and added about 4 tablespoons of malt powder. Then I divided the mix evenly and added about 4 tablespoons of cocoa powder to one half, making it chocolate. I cold have added some melted chocolate chips, too but I didn't think about that until later.

    So, the cake was a decadent chocolate malt marble cake. And such a cake wouldn't be complete with out chocolate malted frosting as well. This was an absolute bomb of a cake and may have been the tastiest thing I've ever made or eaten. And, I made it really small, a 6" round which was perfect because once my guests and I were served, there wasn't anything left. This was not something that my waistline needed a second helping of, even though after several glasses of milk, my taste buds were craving more.

    photo.JPG

    And finally, the baking ended this past weekend. My brother earned his Eagle Scout award and my mother commissioned me for 100 Eagle Scout cupcakes to serve as refreshments. I found an eagle scout candy mold and made the little cakes as patriotic as I could muster. They were vanilla with chocolate frosting, milk chocolate with chocolate frosting and chocolate chocolate chip with vanilla bean frosting.

    Phew!

    I gained 5 pounds just writing this post. If you want more details on cakes and recipes, just send me an e-mail.

    Sunday, May 22, 2011

    White Bean Chili

    3-4 chicken breasts, cubed
    1 1/2 tsp. garlic powder
    1 T. oil
    1 medium onion, chopped
    2 cans Great Northern beans, rinsed and drained
    1-2 small cans green chilies
    1 tsp. cumin
    1 tsp. oregano
    1 tsp. salt
    1/2 tsp. pepper
    1 (14 oz.) can chicken broth
    1 c. sour cream
    1/2 c. whipping cream

    Combine chicken, garlic, oil and onion in skillet and heat until chicken is cooked. Add beans, chilies, spices and chicken broth; bring to a boil. Simmer 30 minutes. Add sour cream and whipping cream and heat through.

    Alterations: You can use canned chicken and any other kind of beans that you have on hand.

    Tuesday, May 17, 2011

    Chocolate Frosting

    IMG_2349

    There are a lot of good recipes out there for homemade chocolate frosting. I've definitely taken the best the web has to offer and modified it to my own recipe. Not only is this good on cake, I'm sure it would be good on cookies and I know it's especially tasty when pretzels are dipped into it.

    Milk Chocolate Icing:
    2 sticks softened butter
    4 tablespoons good cocoa
    1 and 1/2 cup milk chocolate chips, melted in the microwave and cooled a bit
    4 cups powdered sugar
    2-4 tablespoons of milk

    Mix the butter and the cocoa until you have cocoa butter. Add 2 cups of powdered sugar and 2 tablespoons of milk. Mix well. Add more sugar and milk. Add melted chocolate chips. Add more sugar or milk until you get the consistency you're looking for because it's frosting....not exact science.

    This is enough to frost about 28 cupcakes or a decent 9" cake.

    It also looks pretty pipped like little stars on a cake.

    Home made croutons

    photo.JPG

    I love bread. I love croutons. I love olive oil and garlic and balsamic vinegar. It's only natural then that every once in a while I get on a crusty crouton kick and go a little crazy.

    Any sort of day old bread (or fresh for that matter, but a little stale is better) will work, but definitely do not use your run of the mill loaf of bread from the grocery store. You need something more airy and rustic, like ciabatta, focaccia or a good loaf of skinny french bread.

    Cut the bread into thin strips without squishing it. You'll need a good knife. Place strips on a parchment lined cookie sheet and preheat your oven to about 325 degrees.

    While the oven is heating in a small bowl mix olive oil, minced garlic, salt and pepper. Coat each sliced piece of bread, on both sides with the mixture (if you don't have a kitchen brush, you could use a new paintbrush or maybe even just a spoon). Once it's ready to go you can add a little extra salt or even some balsamic vinegar to taste.

    Put the bread in the oven for 5 minutes and watch it. After 5 minutes check to see if the bread is getting golden and crusty and then just watch it every additional two minutes or so until it's looking like you want it.

    Pull out of the oven and let cool. As the bread cools, it will get even more crusty.

    These are great to eat alone with an ice cold diet coke for lunch or you can actually put them on a salad.

    Or load them up with some bruschetta and enjoy a nice appetizer.

    Meat and Potatoes

    photo.JPG

    In our family, we grew up on starchy staples and meat for every meal. Though I cook very differently than my mother, I still enjoy such a meal every once in a while. Okay, every day.

    Not really.

    When I was a kid my mom fixed, "cracker meat". It was cube steak heavily breaded in Ritz crackers. It was a crumbly buttery mess of flavor. My version is a bit lighter but just as tasty.

    Here's what you'll need:
    Cube steak (1 per person)
    2 eggs, lightly beaten
    bread crumbs, home made or store bought
    salt and pepper
    olive oil

    Directions:
    place the eggs in one shallow bowl and the bread crumbs in another. beat the eggs until the yolks and whites are combined. Add a generous amount of salt and pepper to the bread crumbs. Coat each piece of meat in the egg and then press it into the bread crumbs, coating both sides.

    In a frying pan (or an electric skillet) heat about 4 tablespoons of olive oil until it sparks when you sprinkle some water over it. Add the meat to the hot oil and cook each side for 5-8 minutes depending on the heat and how crispy you want the outside.

    Serve with green beans, potatoes, salad, or grilled asparagus.

    Monday, April 4, 2011

    Orange Julius

    photo.JPG

    I love orange julius - especially from home. Once you fix this, you'll never drink that made in the mall stuff every again.

    This is my mom's recipe and we grew up drinking it for breakfast on lazy Saturday mornings with waffles and bacon. Fix it for some family and friends and they'll be amazed that you so quickly whipped up such a delicious concoction.

    You'll need:
    1 can FROZEN orange juice concentrate
    milk (can be whatever you drink from whole to skim and soy and rice, etc.)
    water
    ice
    sugar
    vanilla

    Cut the can of OJ concentrate in half. Scoop 1/2 of the concentrate into your blender. Use the empty can half to measure your milk and water. Fill the can with milk and add it, then with water and add it to the blender. Next, add some sugar. I like my julius sweet so I add about 2 tablespoons of sugar to the mix. Add a cap full of vanilla. Finally add about 1 and 1/2 cups of ice, crushed if you've got it.

    Mix well in a blender until all the ice has been chopped up.

    This serves about 3 large servings or 5 small. If you've got a big group, then prepare the other half of the concentrate. If not, put it back in the freezer for another day.

    Thursday, March 31, 2011

    Quick Cheese Steaks

    12 inches of cheesesteak
    Okay, some background. I love cheese steak sandwiches. Really love them. My love for them didn't really develop until the first time I ate a cheese steak at the Dairy Cottage in a suburb of Philadelphia, Penn. At the Dairy Cottage you either ordered a 12 or 24 inch sandwich and they didn't really recommend sharing.

    That sandwich, featured in the above picture was divine. I've been to Philly several times and eaten lots of steaks, but this one takes the cake over all others.


    Cheese steak
    (Admittedly not the best picture. Sorry)

    We regularly have a homemade version of a cheese steak for dinner.  It's fast and easy to prepare and makes everyone happy.  I've experimented a lot with different meat (deli meat, cube steak, steak thinly sliced) but I think I found the right combination of steak and cheese (we always use provolone but last night I used Swiss) and marinade and they were pretty awesome last night.

    Here's what you'll need:
    Good rolls - 2 per person if they're small.  We like the Ciabata rolls from Harmon's
    Stir Fry beef already cut into strips.  Buy it that way at the grocery store or see if the butcher can do it for you.
    1 large sweet onion
    1-2 red peppers

    For the Marinade:
    salt
    pepper
    garlic or garlic salt (depends on your tastes)
    1 tbsp soy sauce
    2-4 tbsp worcester sauce
    2 tbsp olive oil

    First, place your strips of steak in a zip lock and add the marinade ingredients.  Let it stew for 10-20 minutes.  

    Slice the onion into rings and the red pepper into very thin strips.  Place the onion and pepper into a hot skillet with a little bit of olive oil.  Cook the veggies to your liking....I like them black and caramelized.

    Take the onion and pepper out of the skillet and cook the meat.  Because of the thin strips it will cook fast.  Give it about 3 minutes and toss.  Then add the onion and peppers back into the mix for another 3-5 minutes.  

    Once everything is good and juicy and smells like heaven then add your cheese.  Last night, we used Swiss.  Let the cheese melt into the meat and then serve to family and friends.  The whole process takes about 20 minutes and everyone will walk away full and happy.

    Monday, March 21, 2011

    Stove top potatoes with paprika

    Paprika potatoes

    Oh, how I love potatoes. My sister once told me that if she were to open a restaurant, it would only serve potatoes.

    These potatoes are super yummy and smokey and even though they are cooked on the stove top the taste like they were roasted in the oven.

    Here's what you'll need:
    2-4 Russet potatoes, washed and cut into 1 inch cubes
    olive oil
    salt
    pepper
    1 teaspoon paprika

    Heat about 2 tablespoons of olive oil in a pan over medium heat. When the oil is hot, add the cubed potatoes. Cook the potatoes in 5 minute intervals, covered with a lid. Every 5 min shake and flip the potatoes. You'll do this for 20-30 minutes. The potatoes are done when they are soft enough for a knife to go through them. With about 5 minutes left, sprinkle the paprika over the potatoes and shake to mix.

    Thursday, March 17, 2011

    Mini Meatloaves and Smashed Potatoes (with a St. Patty's Day theme)


    Tonight I made these turkey mini meat loaves and mashed potatoes from Skinnytaste.com. I changed it a tiny bit, because I cannot help myself. Instead of cooking them in a mini loaf pan, I cooked them in a muffin tin sprayed with PAM. They were then personal meat loaves.

    My sister and I have been making a lot of these recipes and I haven't made anything I haven't liked yet.


    In fact, a couple days ago I made Pasta with Cauliflower and it was really good as well. I used four strips of bacon instead of anchovies, because I have never cooked with anchovies and I was a bit scared.

    Cafe Rio-like Sweet Pork

    Sweet pork

    I've seen a lot of recipes that try to recreate the Cafe Rio sweet pork for a salad. I've tried a bunch of them and they all sort of end up the same...tasty.

    I've sort of tweaked them all to come up with something that I really like.

    Sweet Pork
    2-4 pounds pork butt or shoulder
    1-2 cups fresh salsa
    1 cup brown sugar
    1/2 cup coke (not diet, but coke zero can work in a pinch)
    garlic salt
    kosher salt

    Place your cut of pork in your slow cooker. Add the coke, the salsa and the brown sugar. Let the pork cook on low for 8-10 hours (depending on size of your piece of pork) or on high for 4-6 hours. (I prefer to do it low and slow....it seems to end up better that way.)

    Once your meat is totally crumbly, remove it from the slow cooker a little bit at a time to shred it up. Set aside once shredded. As soon as you've finished shredding it all, dump all the remaining juice out of your slow cooker and put the meat back in. Generously salt with garlic salt and kosher/sea salt and sprinkle with a little bit more brown sugar.

    Serve and enjoy.

    Note - this mean is not only good for salads, but tastes great in enchiladas with a green tomatillo sauce, too.

    Thursday, March 10, 2011

    Chocolate Cake with Salted Caramel Icing and Chocolate Ganache

    photo.jpg

    This recipe called for a made from scratch chocolate cake that was sort of a mousse/souffle type thing.  I made that version and it didn't work so I ended up with just a basic chocolate cake.  No worries though because the joy of this cake is in the frosting.

    Salted Caramel Butter cream Icing
    1/2 cup sugar
    4 tablespoons water
    1/2 heavy cream
    1 teaspoon vanilla
    2 sticks room temperature butter
    3 + cups powdered sugar
    1/4 teaspoon good sea salt (or kosher salt, whatever you've got on hand)

    First, you've got to make the caramel.  In a good and sturdy small sauce pot put the sugar and water over medium heat.  This is the base for your caramel.  You'll want to leave it alone (do not stir under penalty of law) and let it boil and bubble away until it is a nice medium amber color.  Remove from the heat and slowly whisk in the cream and vanilla.  Set the caramel aside and let it sit and cool at leas 30 minutes.

    Once the caramel is cooled, you can make the icing.  Cream two sticks of butter with a hand mixer.  Next add the sea salt and half of the powdered sugar.  Mix until combined and then add the caramel and the rest of the powdered sugar.  Depending on the consistency you're going for you might need to add a little milk or some more powdered sugar.

    Chocolate Ganache
    6 oz bittersweet/milk chocolate combination (mix it however you'd like.  I went 4 oz bittersweet and 2 oz milk)
    6 oz heavy cream
    dash of vanilla

    While the caramel is cooling, make your ganache.  Heat the heavy cream over the stove on medium low heat.  As soon as the cream starts to boil pour it over the chocolate (made sure your chocolate is in a heat proof container).  Let stand about three minutes and then whisk the mixture until the chocolate is all melted.  Set the ganache aside.  If it doesn't thicken up enough on the counter top then put it in the fridge for five minutes at a time.  Check it because you don't want it to thicken up into a truffle consistency.

    **
    When you put the cake together, layer some butter cream and ganache between the two layers of the cake and add another layer of ganache to the top of the cake once you do your basic icing job.  Then drizzle some remaining ganache over the cake once it's all iced and ready to serve.

    You'll have enough ganache to eat out of the bowl in your fridge a spoonful at a time for about three days after the cake is devoured.  That is my present to you.

    Wednesday, March 2, 2011

    Spinach Lasagna Rolls


    I made these tonight and they are very good. The recipe is from SkinnyTaste.com.

    I added quartered roasted mushrooms because I had some I didn't want to waste and they were very delicious.

    I also like this website because it has a lot of nutritional information with the recipes, including Weight Watchers points. Check it out.

    Spinach Lasagna Rolls
    Gina's Weight Watcher Recipes
    Servings: 9 • Serving Size: 1 roll • Old Points: 4 pts • Points+: 6 ww pts
    Calories: 224.9 • Fat: 5.1 g • Fiber: 3.4 g • Protein: 13.0 g • Carbs: 31.5


    9 lasagna noodles, cooked
    10 oz frozen chopped spinach, thawed and completely drained
    15 oz fat free ricotta cheese (I like Polly-o)
    1/2 cup grated Parmesan cheese
    1 egg
    salt and fresh pepper
    32 oz tomato sauce
    9 tbsp (about 3 oz) part skim mozzarella cheese, shredded

    Preheat oven to 350°. Combine spinach, ricotta, Parmesan, egg, salt and pepper in a medium bowl. Ladle about 1 cup sauce on the bottom of a 9 x 12 baking dish.

    Place a piece of wax paper on the counter and lay out lasagna noodles. Make sure noodles are dry. Take 1/3 cup of ricotta mixture and spread evenly over noodle. Roll carefully and place seam side down onto the baking dish. Repeat with remaining noodles.

    Ladle sauce over the noodles in the baking dish and top each one with 1 tbsp mozzarella cheese. Put foil over baking dish and bake for 40 minutes, or until cheese melts. Makes 9 rolls.

    To serve, ladle a little sauce on the plate and top with lasagna roll.

    Wednesday, February 16, 2011

    Valentine's Day Dinner for Two

    photo.jpg

    My VD gift this year?  A quiet house.  I spent all day cooking, dumped the kiddos at grandma's house at 5:00, came home cleaned up and ate dinner with my husband in a quiet house.  Then we looked at pictures on the internet.  Then I read a book and he went to pick up the boys.  Other Valentine's present?   The boys came home asleep - no bedtime fights.  Awesome.

    For our dinner I wanted to do something nice - real grown-up food with out chicken nuggets or mini pizzas in sight. I also decided for the most part, do do something traditionally French because when all else fails, go French or go home.

    Le Menu:
    Homemade Croissants (started at 6:30 am and pulled them out of the oven at 4:30 pm.  Not my best effort but they were tasty.)
    Roasted Garlic Mashed Yukon Gold Potatoes
    Beef Bourguignon (ala Ina Garten, the Barefoot Contessa - I totally DID NOT USE COGNAC...the wine is up to you.)

    How was dinner?  Tres Magnifique!  My husband in fact, in the middle of his second helping confessed, "This may be the best meal you've ever fixed."

    Perfect timing - I want a new iphone.

    Beef Bourguignon (Ina Garten, Food Network)

    Ingredients

    • 1 tablespoon good olive oil
    • 8 ounces dry cured center cut applewood smoked bacon, diced
    • 2 1/2 pounds chuck beef cut into 1-inch cubes
    • Kosher salt
    • Freshly ground black pepper
    • 1 pound carrots, sliced diagonally into 1-inch chunks
    • 2 yellow onions, sliced
    • 2 teaspoons chopped garlic (2 cloves)
    • 1/2 cup Cognac
    • 1 (750 ml.) bottle good dry red wine such as Cote du Rhone or Pinot Noir
    • 1 can (2 cups) beef broth
    • 1 tablespoon tomato paste
    • 1 teaspoon fresh thyme leaves (1/2 teaspoon dried)
    • 4 tablespoons unsalted butter at room temperature, divided
    • 3 tablespoons all-purpose flour
    • 1 pound frozen whole onions
    • 1 pound fresh mushrooms stems discarded, caps thickly sliced

    For serving:

    • Country bread or Sour Dough, toasted or grilled and rubbed with garlic clove
    • 1/2 cup chopped fresh parsley, optional

    Directions

    Preheat the oven to 250 degrees F.
    Heat the olive oil in a large Dutch oven. Add the bacon and cook over medium heat for 10 minutes, stirring occasionally, until the bacon is lightly browned. Remove the bacon with a slotted spoon to a large plate.
    Dry the beef cubes with paper towels and then sprinkle them with salt and pepper. In batches in single layers, sear the beef in the hot oil for 3 to 5 minutes, turning to brown on all sides. Remove the seared cubes to the plate with the bacon and continue searing until all the beef is browned. Set aside.
    Toss the carrots, and onions, 1 tablespoon of salt and 2 teaspoons of pepper in the fat in the pan and cook for 10 to 15 minutes, stirring occasionally, until the onions are lightly browned. Add the garlic and cook for 1 more minute. Add the Cognac, stand back, and ignite with a match to burn off the alcohol. Put the meat and bacon back into the pot with the juices. Add the bottle of wine plus enough beef broth to almost cover the meat. Add the tomato paste and thyme. Bring to a simmer, cover the pot with a tight-fitting lid and place it in the oven for about 1 1/4 hours or until the meat and vegetables are very tender when pierced with a fork.
    Combine 2 tablespoons of butter and the flour with a fork and stir into the stew. Add the frozen onions. Saute the mushrooms in 2 tablespoons of butter for 10 minutes until lightly browned and then add to the stew. Bring the stew to a boil on top of the stove, then lower the heat and simmer for 15 minutes. Season to taste.

    Monday, February 7, 2011

    SUper Bowl!

    photo.jpg

    We had plans for a big super bowl party yesterday. Only one problem though. The host, my mom, was sick and the party got canceled. We switched plans, found some guests, and had a mini party at our house instead for the big game, which I didn't watch.

    I was already planning on making potato skins so I just stood in my refrigerator for about 15 minutes and tried to figure out what else to serve our guests.

    Our menu ended up being pretty simple but very yummy.
    Potato skins
    Home made chicken fingers (with a couple dipping sauces)
    Nachos (with salsa and guacamole)
    Chocolate chip nutella cookies.

    It was total football food - Nothing healthy, everything tasty and from start to finish it only took me two hours to throw it all together. And even better, I have left over potato skins for today.

    photo.jpg

    Potato Skins
    (adapted from Pioneer Woman)
    6 Russet Potatoes
    10 slices of bacon
    cheese
    green onions/chives
    sour cream

    Bake the potatoes at 400 for 1 hour. Pull from the oven and let cool until you're brave enough to handle them, 10-20 minutes.
    Cook your bacon.  When it's cooled, crumble it up.
    Grate cheese.
    Slice in half and scoop out the majority of the potato.
    Brush the skins, both sides, with vegetable oil and salt both sides liberally.
    Bake for 7 minutes. Flip and bake for another 7-10.
    Pull from oven. Add cheese and bacon. Put the skins back in the oven until the cheese is melted.

    Top with green onions, chives, and sour cream as desired.

    Saturday, January 29, 2011

    S'more on a stick

    IMGP0065

    Elliott's birthday was last weekend.  I wanted something yummy and quick to go with his cake, just as another food option.  I'm sure that this idea isn't new, but I was pretty impressed that I came up with it.  I made them two days in a row and then were crowd pleasers to say the least. 

    So easy and yummy and mess free, this might be one of my more brilliant food inventions.

    You'll need:
    popsicle sticks
    giant marshmallows
    melting chocolate
    crushed up graham crackers

    Put the marshmallows on the stick. Dip in melted chocoate. Coat in graham crackers.

    Eat.

    Wednesday, January 26, 2011

    Hasselback Potatoes

    photo.jpg

    So easy and yummy is this one.

    All you need:
    Russet potatoes, one per person
    Garlic, at least one clover per potato
    Butter, 1 tablespoon per potato
    olive oil
    coarse salt
    pepper

    Scrub your potatoes till they shine.
    Thinly slice the potato into rings but DO NOT cut all the way through. The sliced need to stay hooked together.
    Between each slice of potato stuff a thinly sliced piece of garlic.
    Douse the potato in olive oil, salt and pepper and put a pat of butter on top.

    Bake at 425 degrees for at least 55 minutes. You'll probably need to cook them longer than that though, because every 15 minutes or so you need to open the oven and baste the potatoes in the butter/olive oil that's floating around on the pan.

    Once the potatoes are knife soft and thoroughly cooked, remove from the oven and tent with foil for 5-10 minutes. Add a little extra butter, salt and pepper and enjoy.

    Thursday, January 13, 2011

    Comfort Food

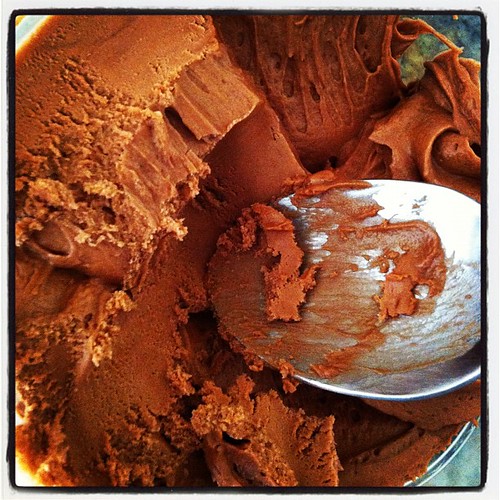
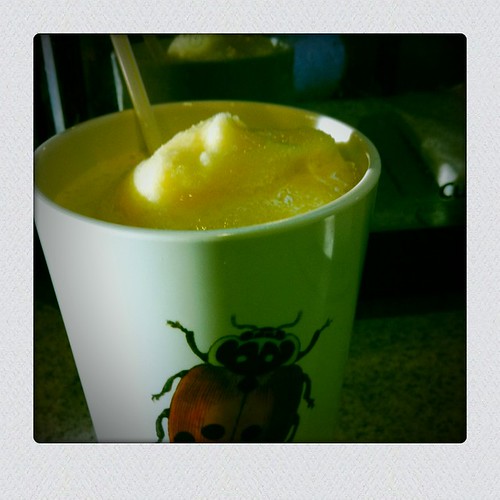
    Everyone does it - has a few dishes, candies, treats that they eat when they just NEED it...comfort food.  That one thing (or in my case, dozens of things) that you choose to eat when your happy, sad, sick or whatever else.

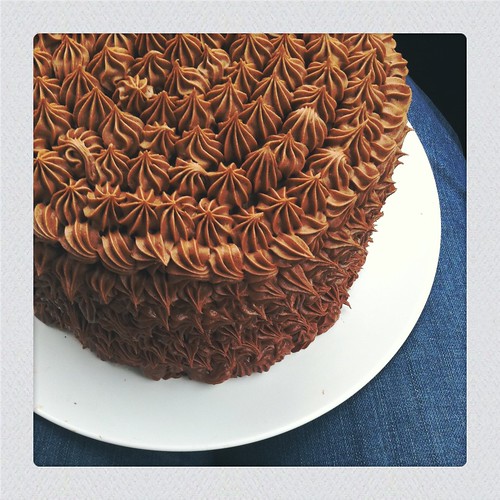
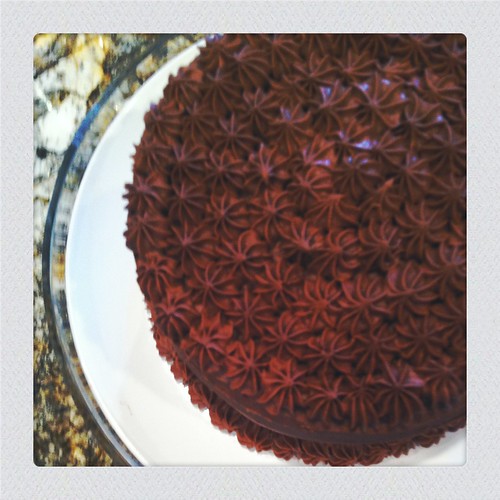
    Stuff like hot chocolate with ice cream in it, a chocolate shake, some chocolate frosting.  You see where I'm going with this?  Or, homemade chocolate frosting with some pretzels for dipping?  Yes, you definitely see where I'm going with this.

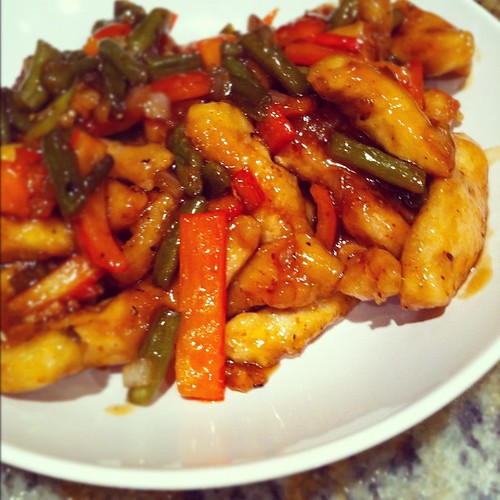
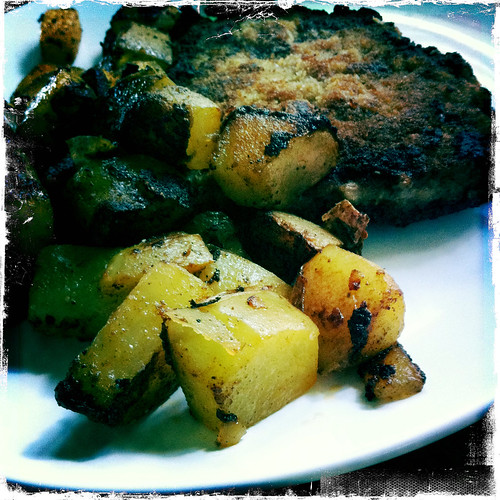
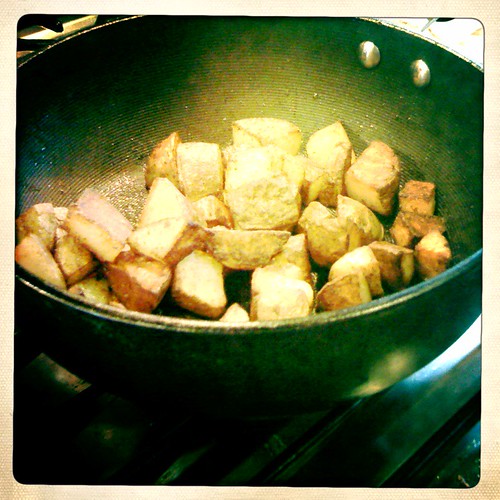
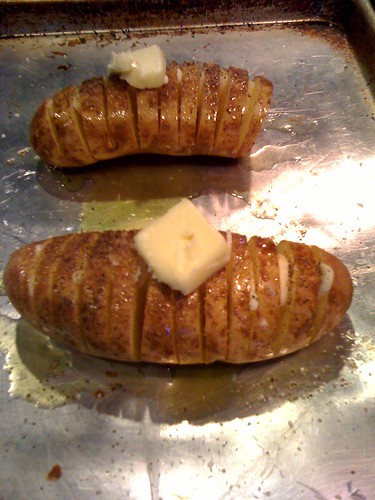
    Sometimes though I like comfort food, not just comfort chocolate, when I'm neither sick nor sad.  My kids are sick and that's wearing on me a bit.  It's really hard to figure out what to cook for dinner when everyone is coughing and crying and snotting all over the place.  That's where the comfort food comes in...comfort for me anyway.  Last night we had balsamic marinated chicken for dinner with fried potatoes.

    mmmmmmm, fried potatoes.

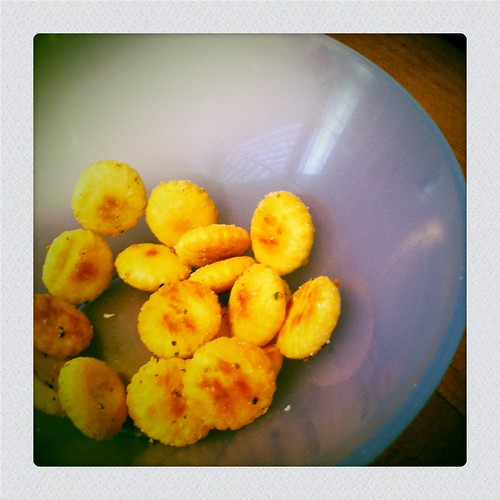
    This you see, as I was diving in last night, is one of my comfort foods.  One of those things that always sounds good, that I'll always eat, something that warms me up and makes me happy.  They were absolutely delish by the way.

    Go out and fry yourself up some tonight - the more butter the better.

    Fried Potatoes:
    4-6 Yukon gold potatoes
    butter
    salt and pepper

    In a large pot on the stove top, boil your potatoes.  Depending on the speed of your range, you'll boil them at least 20 minutes, probably more.  You want them soft enough that a butter knife can cut through them easily.

    Remove the potatoes from the water and drain in a colander.  Let them sit about 10 minutes to work off a little heat.  Once they are cool enough for you to touch, slice them up thin.  They will start to crumble a bit but that's okay.  You want the crumble.  Leave the skins on, too.

    Once the golden beauties are sliced, melt some butter in a large skillet.  Okay, melt a lot of butter, a couple of tablespoons just to be safe.  When the butter is nice and melty and bubbling add the potatoes and spread them out as evenly as possible.

    The potatoes have already been cooked so basically you're just browning them up and "crustifying" them.  Oh, I love crusty potatoes.  If I were you, I'd leave them about 7 minutes per side and flip them over.  Cook and flip until you've got them nice and golden.  Add a little more butter if they look sad.  Add salt and pepper to taste.

    Enjoy.

    Tuesday, January 11, 2011

    Sweet 16 Cake

    photo.jpg

    Right before the new year, my brother turned 16.  He wanted a parade and gangster rappers, and a masquerade ball with some llamas. He settled for 6 hours of basketball, Litza's pizza, and a homemade birthday cake.

    When planning his cake, he wanted an extravagant 4 layers of chocolate and cherry chip cake with as decadent of icing as I could manage.  Once the big day came, and the basketball games got moved up 3 hours, I had to hurry.  We settled on two layers - cherry cake with cherry icing on the inside and chocolate icing with a chocolate ganache to finish it off.

    Oh, it rich.  I think it gave everyone who partook a bit of a tummy ache -but it was worth it.

    The interior icing was cherry butter cream.
    The exterior icing was milk chocolate.  It was a basic chocolate butter cream but right at the end, you add 3/4 cup of melted milk chocolate chips to the mix.  I made extra and enjoyed it with salty pretzels the next day.
    On top of that, was a bittersweet chocolate ganache.  Ganache is so simple, it's a shame people don't make it more often.

    Milk Chocolate Icing:
    2 sticks butter - very soft
    2 tablespoons cocoa powder
    mix the butter and cocoa together
    alternate between adding a bit of milk (2 tablespoons) and 4 cups powdered sugar.
    add 3/4 cups melted (still warm but not hot) chocolate chips.


    Chocolate Ganache:
    There are a lot of ways to do it, but I've always learned that you do equal parts cream and chocolate and that you shouldn't use milk chocolate.  Not sure why - but I'm sure it's because the cocoa content isn't as significant in milk as in bittersweet.

    8 oz heavy cream
    8 oz bittersweet chocolate

    heat the heavy cream on your stove top.  You know it's ready when the edges start to bubble and there is a visible film on the top.  Remove the cream from the heat and pour it over the chocolate.  Let the mixture sit a couple of minutes and then break out a whisk and mix the chocolate and cream together.  Then let it sit.  The longer it sits, the thicker it will get.  If you refrigerate the ganache for about 8 hours you can then make truffles.  If you leave it for 10-20 then it's perfect to pour over the top of a cake.

    Cherry Chocolate Cupcakes

    IMG_1802

    I made these quite a few times over the holidays. They were simple and oh so yummy. I love cherry cordials so it was a natural fit to find this recipe and make it my own.

    To start - take a chocolate cake and doctor it up anyway you'd like. In addition to the normal changes I made (sour cream, buttermilk and pudding) I added a butt load of maraschino cherry juice to the mix.

    Bake and let cool.

    The icing - oh how divine is cherry icing? Pretty close to heaven if you ask me. The icing was a basic butter cream but without vanilla. Start with two sticks of very soft butter and at least two tablespoons of cherry juice. Mix well. Then start adding the powdered sugar and a little bit of milk. You'll need about 4 cups of sugar, give or take, depending on how much milk you've added to keep it creamy.

    Then, once the icing is mixed, add your chopped up maraschino cherries. Incorporate those by hand and add as many or as few as you'd like.

    Next, pipe the icing onto your cupcakes with a pretty big tip because the cherry chunks can mess you up if you're not careful. Once cupcakes are iced, stick the whole batch in the fridge and let the icing chill for about an hour. Once that time is up pull the cupcakes out of the fridge and get them ready to dip.

    Melt your favorite brand of chocolate melts (or chocolate chips) in the microwave in a large bowl. Once melted, dip your cupcakes one at a time into the melted chocolate, just covering the top of the icing. Do this for all the cupcakes.

    Then your finished. Box them up. Eat them up. Share them with neighbors.